Learn how to make reusable beeswax wraps at home using beeswax, pine resin and jojoba oil. This tested DIY beeswax wrap recipe creates flexible, sticky food wraps that can replace plastic cling wrap for sandwiches, bread, bowls and leftovers.
At Biome, we tested multiple ingredient ratios to create a homemade beeswax wrap recipe that stays pliable without cracking, and sticky without becoming overly tacky.
First published in May 2023. Updated in July 2026.

Achieving the perfect beeswax wrap consistency can be tricky. The wax coating needs just the right amount of stickiness to grip, and just the right amount of flex so it does not crack when moulded. The type of beeswax you use can also make a difference, so we recommend starting with just a small quantity at first to trial your mixture.
What ingredients do you need to make beeswax wraps?
To make homemade beeswax wraps, you need three key ingredients: wax, pine resin and oil. Each plays an important role.
- Cotton or linen fabric: the base of your reusable food wra
- p
- Beeswax or candelilla wax: creates structure and water resistance
- Pine resin: creates tackiness so wraps cling
- Jojoba oil: adds flexibility and helps prevent cracking
Together, these ingredients create wraps that are sticky, flexible and reusable.
Make your own beeswax wrap recipe
This recipe makes enough mixture to cover approximately one 25cm x 25cm piece of fabric.
Ingredients
- Cotton fabric cut to size. Use pinking shears to reduce frayed edges.
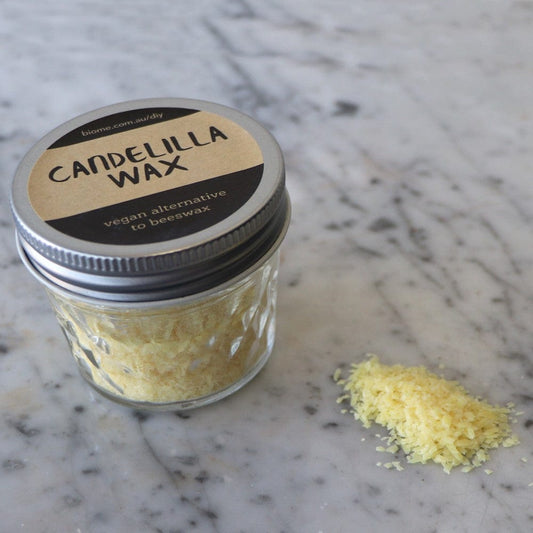
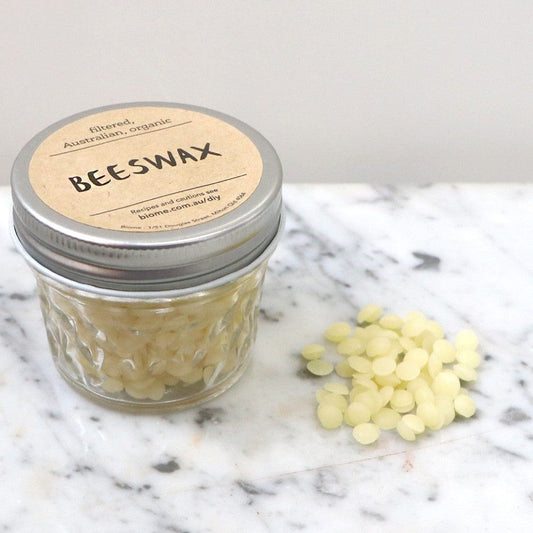
- 17g beeswax, either beads or grated from a beeswax block. For a vegan version, use candelilla wax
- 5g gum rosin, also known as pine resin
- 1/2 tbsp jojoba oil
You will also need
- A glass bowl or heatproof jar
- Saucepan
- Spoon for stirring
- Oven and oven tray
- Baking paper
- Paint or basting brush. Keep this brush for beeswax wraps only.
- Clothes hanger or stainless steel pegs for drying
Method
- Preheat your oven to 150°C.
- Place the beeswax, pine resin and jojoba oil into a heatproof jar or glass bowl.
- Sit the jar in a saucepan filled with about 5cm of water to create a double boiler.
- Place the saucepan on the stove over medium heat and allow the water to simmer gently. Stir the mixture occasionally until fully melted. Pine resin takes longer to melt than beeswax, so keep stirring until there are no gritty pieces left.
- Line an oven tray with baking paper and place your fabric flat on top.
- Once the beeswax mixture has completely melted, drizzle it evenly over the fabric with a spoon.
- Place the tray into the oven for about 2 minutes to help the wax mixture spread more easily.
- Carefully remove the tray and use your brush to spread the mixture evenly across the fabric. Make sure you cover the edges and corners.
- Place the tray back into the oven for about 1 minute to smooth out any bumps, dry patches or clumps.
- Remove from the oven and lift the fabric carefully. Hang with pegs until set and dry.
If the wrap looks patchy, place it back in the oven briefly and brush the wax more evenly. If it feels too sticky once dry, use a little less pine resin next time.
How to Make a Vegan Wax Wrap
For a vegan version, you can substitute candelilla wax for beeswax, but the amount to use may take some experimenting. Biome has only trialled this recipe using beeswax.
Why Homemade Beeswax Wraps Fail
Making DIY beeswax wraps can be surprisingly tricky. Small changes in the balance of beeswax, pine resin and jojoba oil can completely change how the wraps perform.
At Biome, we tested multiple recipes before landing on a formula that creates wraps which are sticky enough to cling, but flexible enough to fold without cracking.
Here are the most common homemade beeswax wrap problems and how to fix them.
Why are my beeswax wraps too sticky?
If your wraps feel overly tacky or leave residue on your hands, the recipe probably contains too much pine resin.
Fix: Reduce the amount of pine resin slightly in your next batch.
Why are my beeswax wraps cracking or flaking?
Cracking usually means the wrap is too rigid, the wax coating is too thin, or the coating has worn away.
This can happen when there is not enough jojoba oil, too much wax, or the wrap is folded while cold.
Fix: Add a little more jojoba oil or apply a thicker, more even coating.
Why are my beeswax wraps too stiff?
Stiff wraps usually need more flexibility in the wax blend.
Fix: Increase the jojoba oil slightly to soften the coating and improve flexibility.
Why are my beeswax wraps too soft?
If the wraps do not hold their shape or cling properly, there may not be enough beeswax in the mixture.
Fix: Add a little more beeswax to create better structure.
Why won’t my beeswax wraps stick?
Usually this means there is not enough pine resin in the recipe. Pine resin creates the gentle tackiness that helps wraps cling around bowls, sandwiches and bread.
Fix: Increase the pine resin slightly in your next batch.
Common DIY beeswax wrap mistakes
- Using hot water to wash wraps
- Applying the wax too thinly
- Skipping pine resin
- Using synthetic fabric
- Wrapping hot food
How to use & clean your homemade beeswax wrap
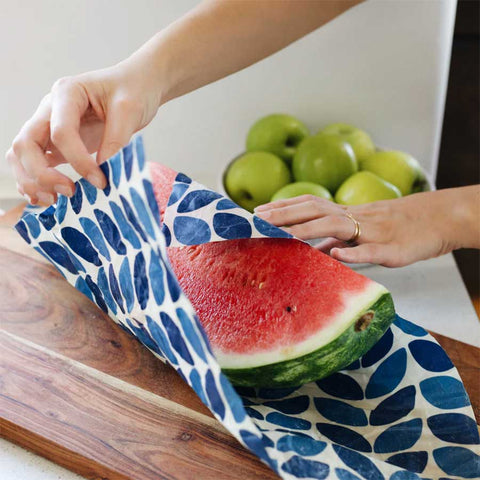
Reusable beeswax wraps are an excellent alternative to plastic cling wrap and zip lock bags. Use them to wrap cut fruit and veggies, sandwiches and rolls, and to cover plates and bowls.
To store: fold neatly and keep in a cool, dry place such as a kitchen drawer.
To clean: wipe your wax wrap after use with a damp cloth and allow to air dry. Wash with mild natural detergent in tepid water. Pat dry with a clean tea towel and air dry.
Do not use warm or hot water, as it will melt the wax. Beeswax wraps arenot suitable for the dishwasher, washing machine, microwave or oven. Do not use with raw meat. Keep out of direct sunlight.
Please note: as our beeswax is pure, it has a yellow tint. The yellow colour will not show as much on coloured fabric.

Frequently Asked Questions
What is gum rosin, or pine resin, used for in beeswax wraps?
Gum rosin is a brittle, crystal-like, amber substance from pine tree sap. Ours is pure, food grade and ethically sourced from India.
Gum rosin is available in powdered form or in chunks. They are the same, but powdered gum rosin will dissolve faster.
Gum rosin helps to make the wraps sticky. Without gum rosin, the surface of your wrap will be too smooth, much like a beeswax candle.
What is the best beeswax to use for a beeswax wrap recipe?
At Biome, our mission is all about living gently on the planet without harm to people and all creatures. Bees are a very special species and they play a vital role in our ecology. Without bees, we would have no pollination to grow many of the fruits and vegetables we eat.
Bees must be treated with care. We recommend only ethically sourced beeswax Australia and honey from local, trusted beekeepers.
How do you refresh an old beeswax wrap that has lost its coating?
Go here for instructions on How to Refresh a Beeswax Wrap.
It is most easily done with an already blended beeswax refresher block that you can grate over the wrap and then place in an oven, iron between baking paper or even melt in the sun.
Related reading
Are Beeswax Wraps Hygienic? How To Clean Them Safely
War on Waste: Your ABC Game Plan to Reduce Waste
Do Beeswax Bread Bags Keep Bread Fresh?
What to Use Instead of Plastic Cling Wrap
5 Clever Ways to Use Beeswax Wraps
What's the Difference Between Beeswax and Candelilla Wax?
How Long Do Beeswax Wraps Last For?